0x01 背景
由于docker具有快速、简捷、轻量的特点,小迅这几年也是在大量的使用docker作为开发、测试、搭建服务的工具。对它的依赖深了,逐渐觉得在每一台机器上都安装一套docker环境太麻烦,正好最近为了学习K8S搭了一台PVE,那今天就来把podman装到PVE上!
那为啥今天不是安装docker,而是安装podman呢?小迅认为,主要是由于以下几点原因:
- 更加 rootless , 尽管 docker 也可以 rootless, 但是 podman 设计之初就开始支持
- 没有 daemon , 这使得 podman 在结合 namespace 和 cgroup 一起使用会更加灵活
- pod , 和 k8s 基本一样的 pod , 一样支持 infra 容器. 这使得一些简单的容器编排 工作, podman 也可以简单实现.
- systemd service 集成, 由于没有 deamon , podman 通过 generate 子命令, 可以生成 systemd service 配置, 来管理容器和 pod 的作为服务启动.
- k8s 关联, podman 可以生成 kubectl 的 yaml 配置文件, 也通过 podman play kube 来运行 k8s 的配置, 也可以作为 k8s 的一个过渡吧, 而且 podman 也没有去实现 CRI 的计划, 这应该也是官方的态度, 不会参和到 k8s 生态中, 保持自己的轻量化工具的定位吧.
- remote , podman 通过 ssh 隧道或者 tcp 端口, 可以连接到远程机器上的 podman service, 从而实现远程机器上的容器和 pod 管理.
- registry mirror,docker下设置mirror只能代理docker.io的镜像,不够灵活
对于家用以及开发测试这样的场景,跑一套docker实在麻烦,podman正好具备了轻量而又灵活的特点。人生苦短,我选podman!
PVE,全称Proxmox Virtual Environment,是基于Debian的Linux系统,虚拟机内核为KVM。硬件兼容性优秀。界面功能不强,很多操作要靠命令行,但扩展能力几乎是无限的。
LXC(Linux Container)容器是一种内核虚拟化技术,可以提供轻量级的虚拟化,以便隔离进程和资源。
简单来说,LXC的虚拟化基于宿主机的内核上去运行另外一个操作系统,并将这部分程序隔离,这就和Docker的原理很相似。虚拟机在运行的时候会虚拟化CPU,并在虚拟化的CPU再单独运行一套内核来安装系统,这样会有小小的性能损耗。
0x02 创建LXC虚拟机
有了PVE后,可以使用LXC容器化一个Linux系统,来安装podman,就不用再用比较重的方式去创建一台虚拟机了。在PVE中,LXC容器叫做CT。
1、设置镜像源
由于众所周知的原因,PVE默认的CT模板源几乎处于不可用的状态,设置镜像源可以极大的提升部署体验。
PVE的CT模板配置文件位于/usr/share/perl5/PVE/APLInfo.pm。可以使用如下命令修改:
1 | cp /usr/share/perl5/PVE/APLInfo.pm /usr/share/perl5/PVE/APLInfo.pm_back |
重启后生效。
2、下载模板
首先,进入local设置,点击CT模板,点击模板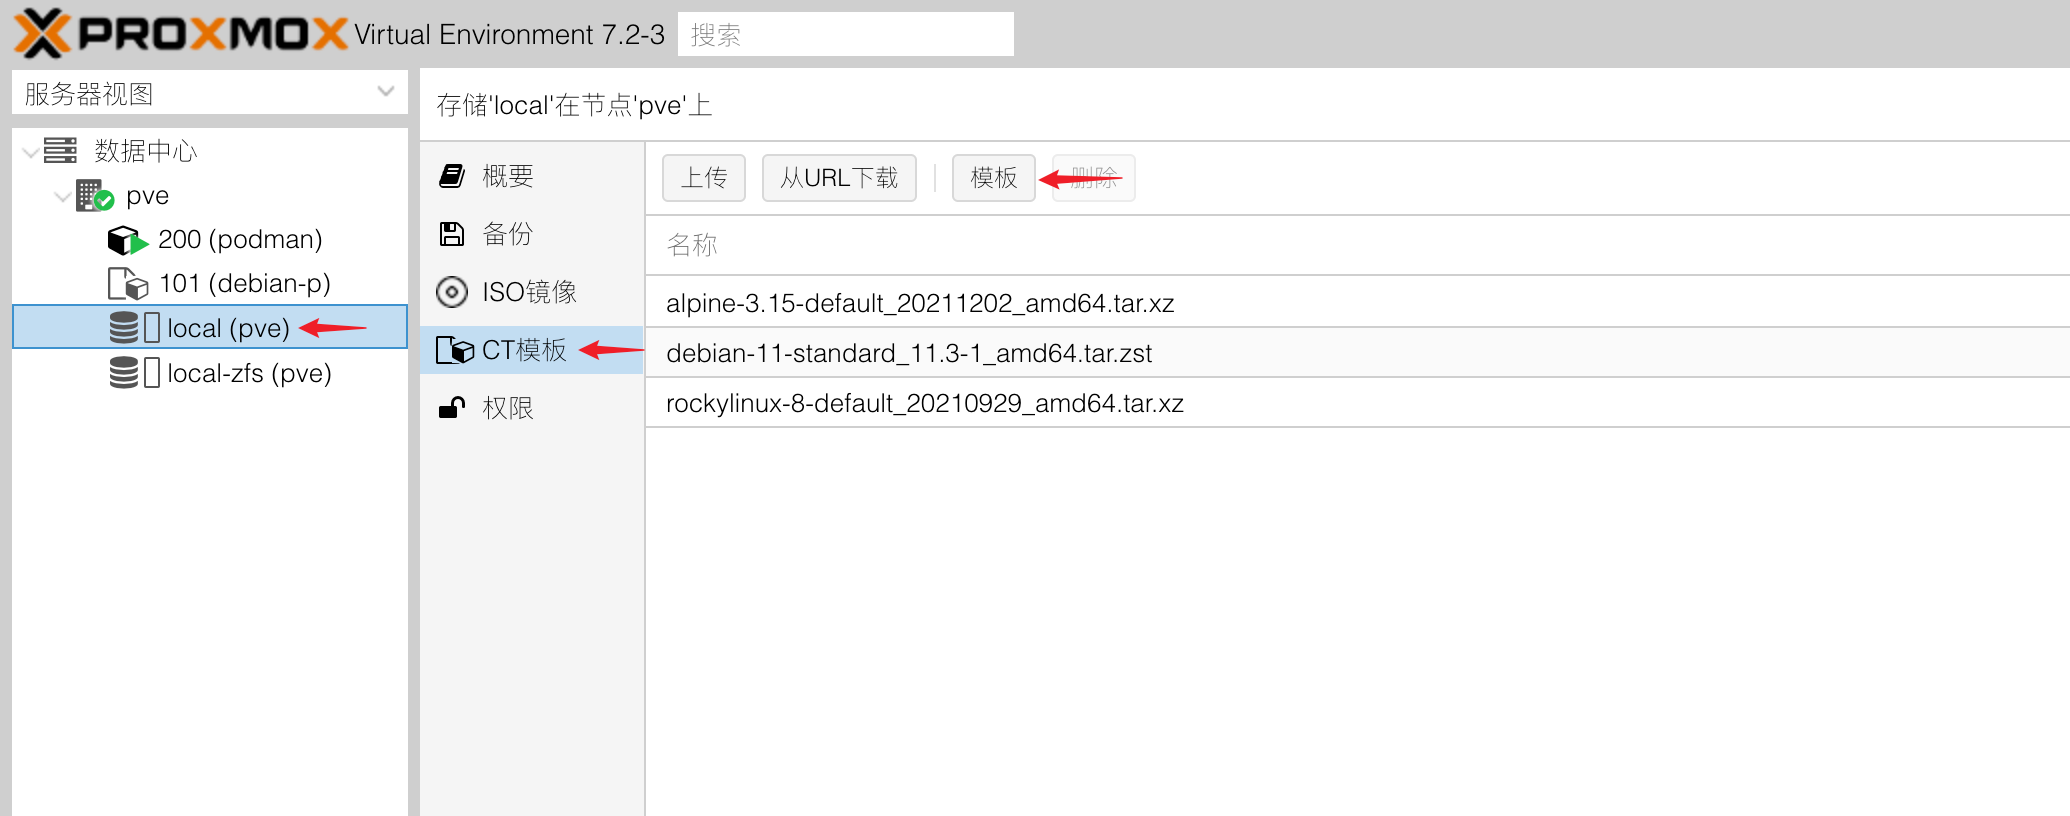
为了避免意外的折腾,咱们选择
debian与pve系统发行版保持一致,以提升稳定性
咱们使用debian系统部署podman。直接下载最新模板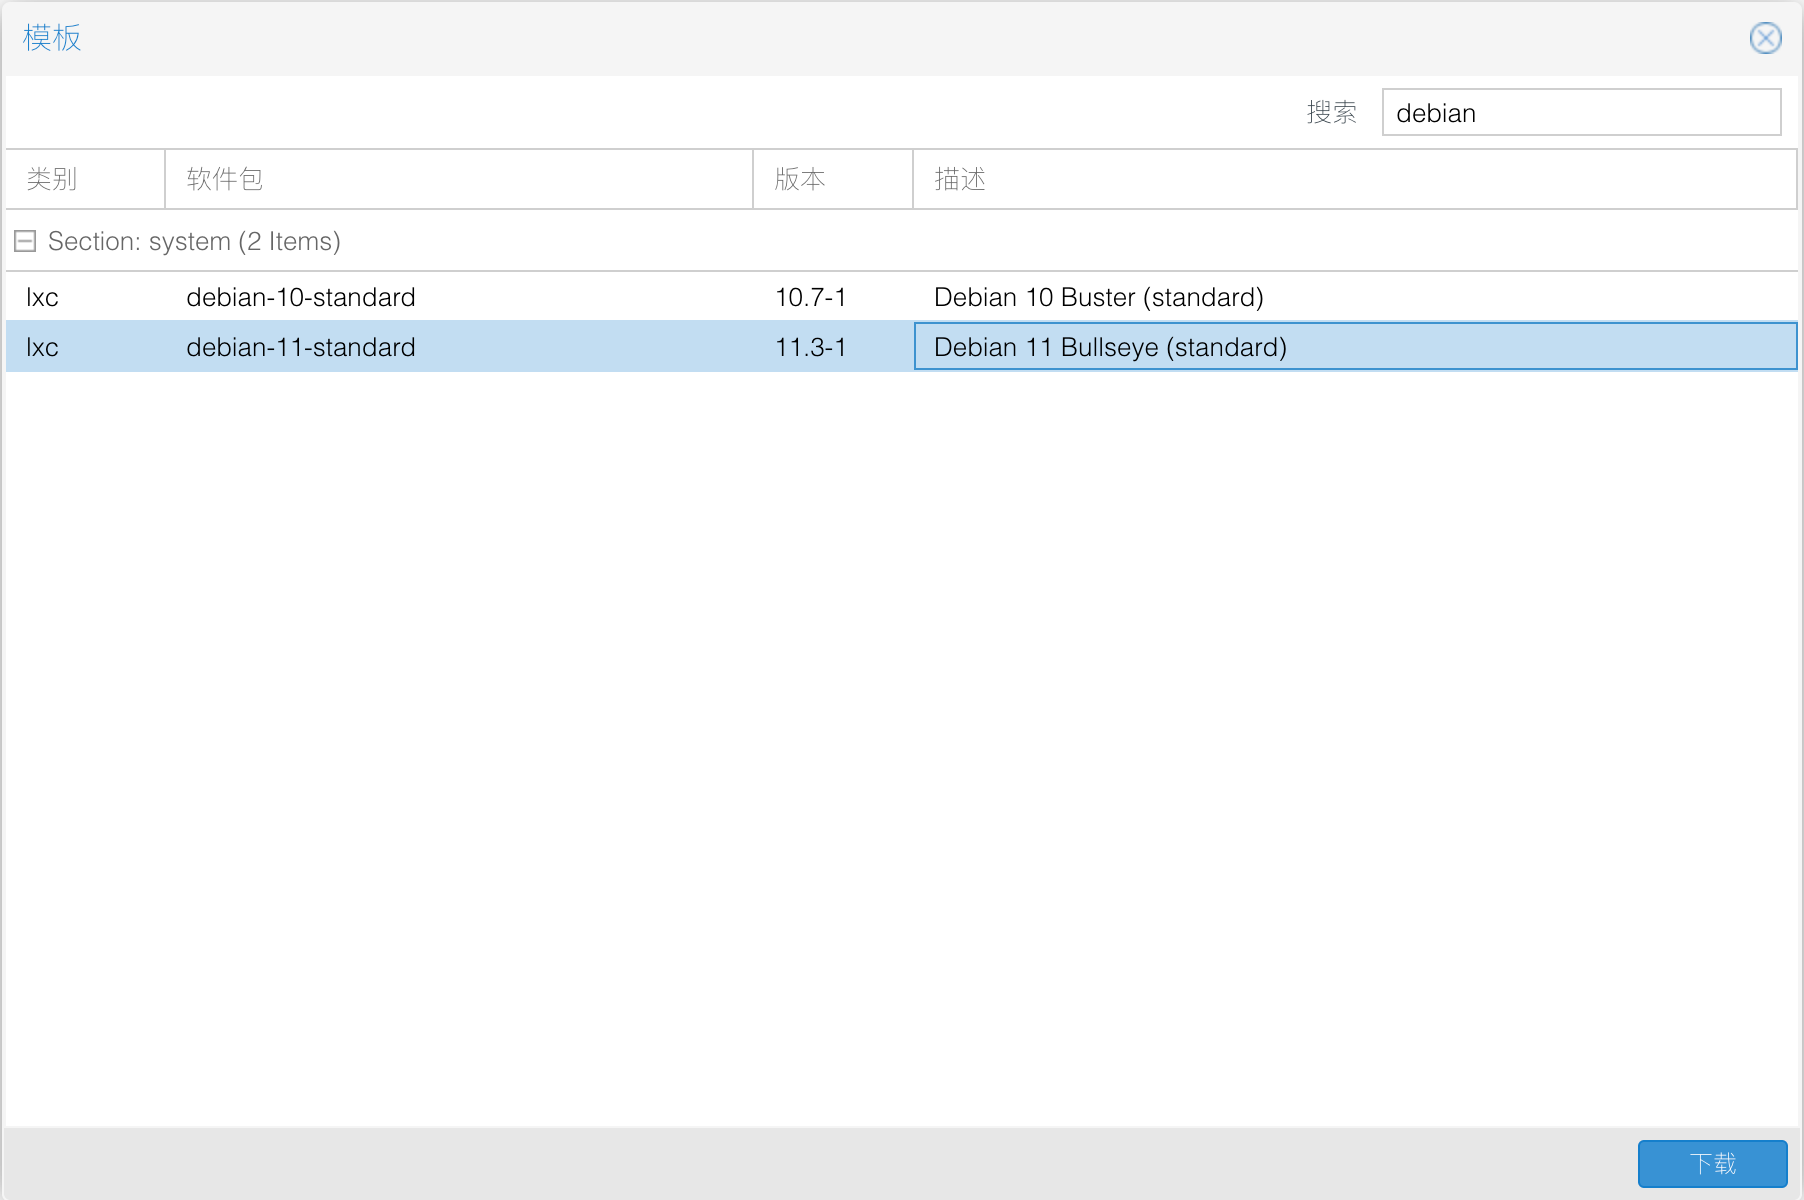
3、创建容器
准备好模板后,咱们点击右上角创建CT
主机名随意,密码随意
取消勾选无特权的容器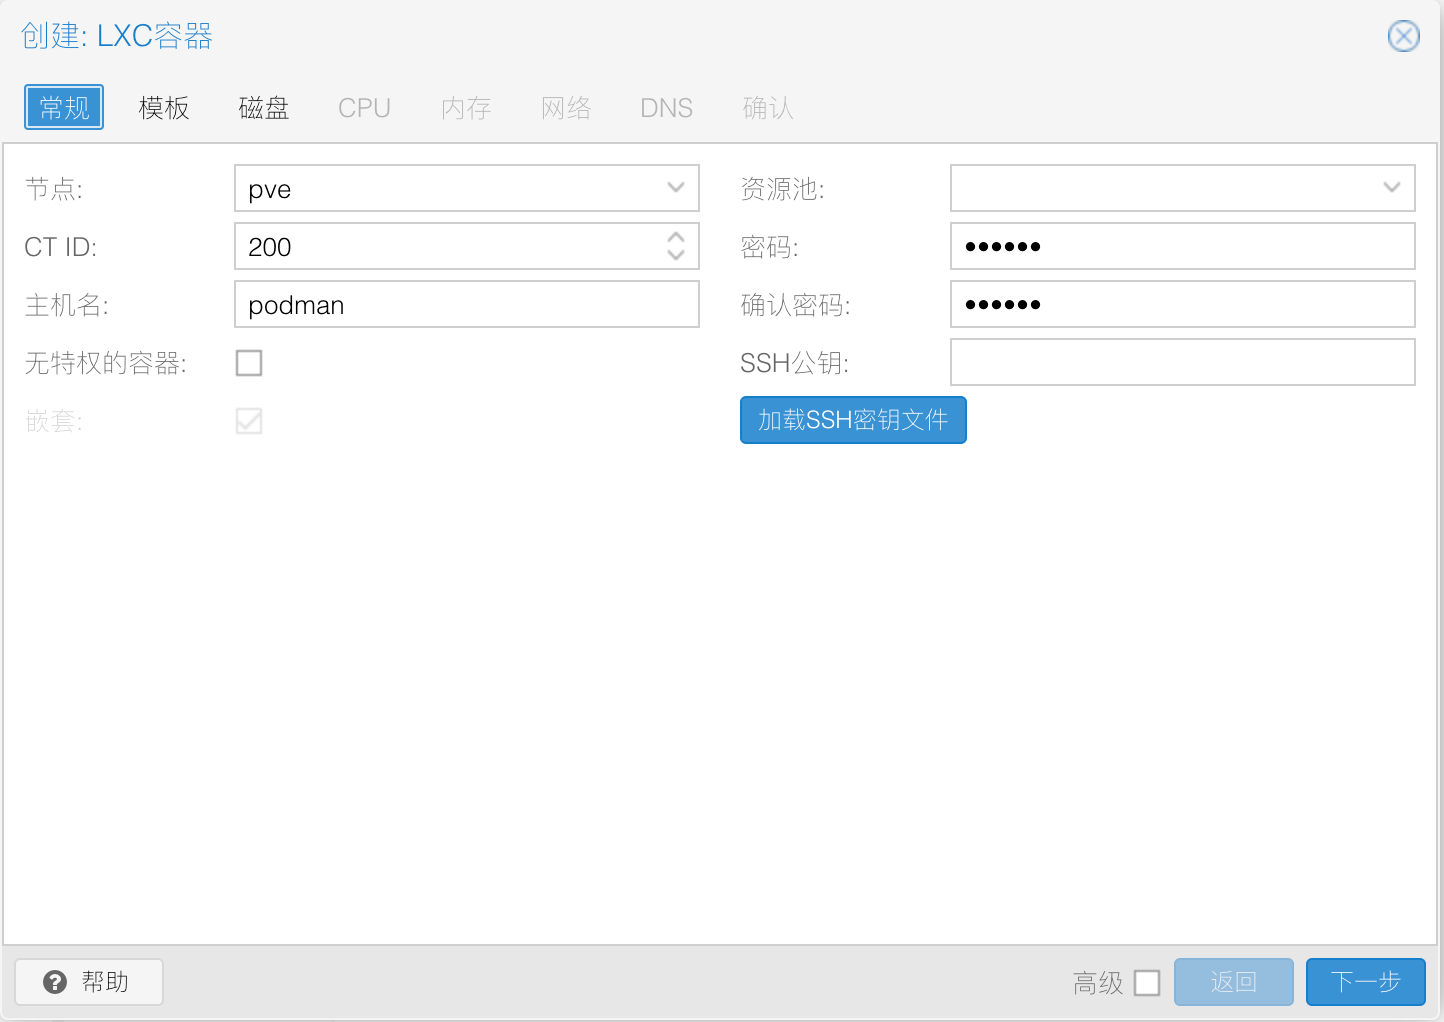
模板选择咱们刚刚下载的debian
磁盘可以稍微调大一点,PVE的磁盘默认是随使用增长的类型,不会一下子就搞出一个大文件,为了防止以后扩容麻烦,小迅设置了20G
CPU、内存根据宿主机的配置而定
配置一下IP地址,之后咱们远程连接的时候要用到
确认配置:
创建好CT后,先不急着启动,勾选一下嵌套和FUSE
0x03 配置Debian
LXC虚拟机配置好以后,接下来咱们就配置debian
启动虚拟机,进入控制台,使用root用户登录,密码是刚刚第一步设置的密码。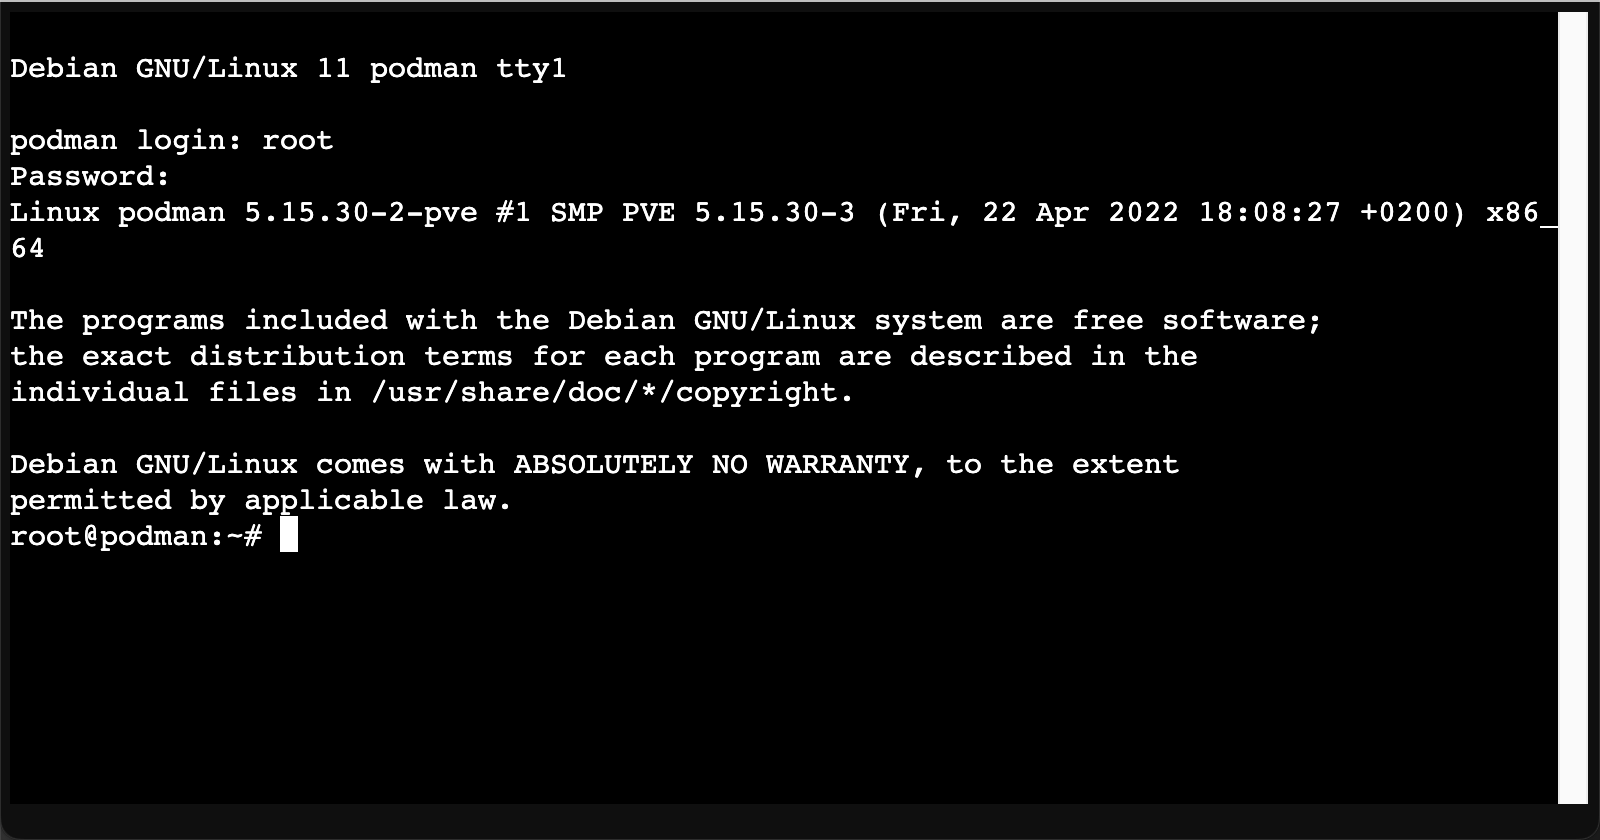
1、设置镜像源
一行命令搞定
1 | cp /etc/apt/sources.list /etc/apt/sources.list.bak \ |
2、安装podman
一行命令搞定
1 | apt-get install -y podman |
0x04 配置podman
1、设置镜像源
备份一下配置文件/etc/containers/registries.conf
1 | mv /etc/containers/registries.conf /etc/containers/registries.conf.bak |
/etc/containers/registries.conf改为如下内容:
1 | unqualified-search-registries = ['docker.io'] |
验证一下
1 | podman run --rm hello-world |
2、允许SSH-Key登录
执行如下命令生产SSH-Key,一路按回车
1 | ssh-keygen -t rsa |
在服务器上安装公钥
1 | cp ~/.ssh/id_rsa.pub ~/.ssh/authorized_keys |
复制~/.ssh/id_rsa文件的内容备用,在配置podman远程主机的时候要用到
至此,服务器上的配置就完成了
0x05 podman-remote设置
1、下载对应的podman-remote
podman-remote的API Version要与服务端匹配,不然就会报错Error: unable to connect to Podman socket: server API version is too old. Client "4.0.0" server "3.0.0"
先看下服务端的版本
1 | podman version |
记一下,小迅的版本号是3.0.1,那么咱们就去github下载对应的二进制文件。github release地址:https://github.com/containers/podman/releases/tag/v3.0.1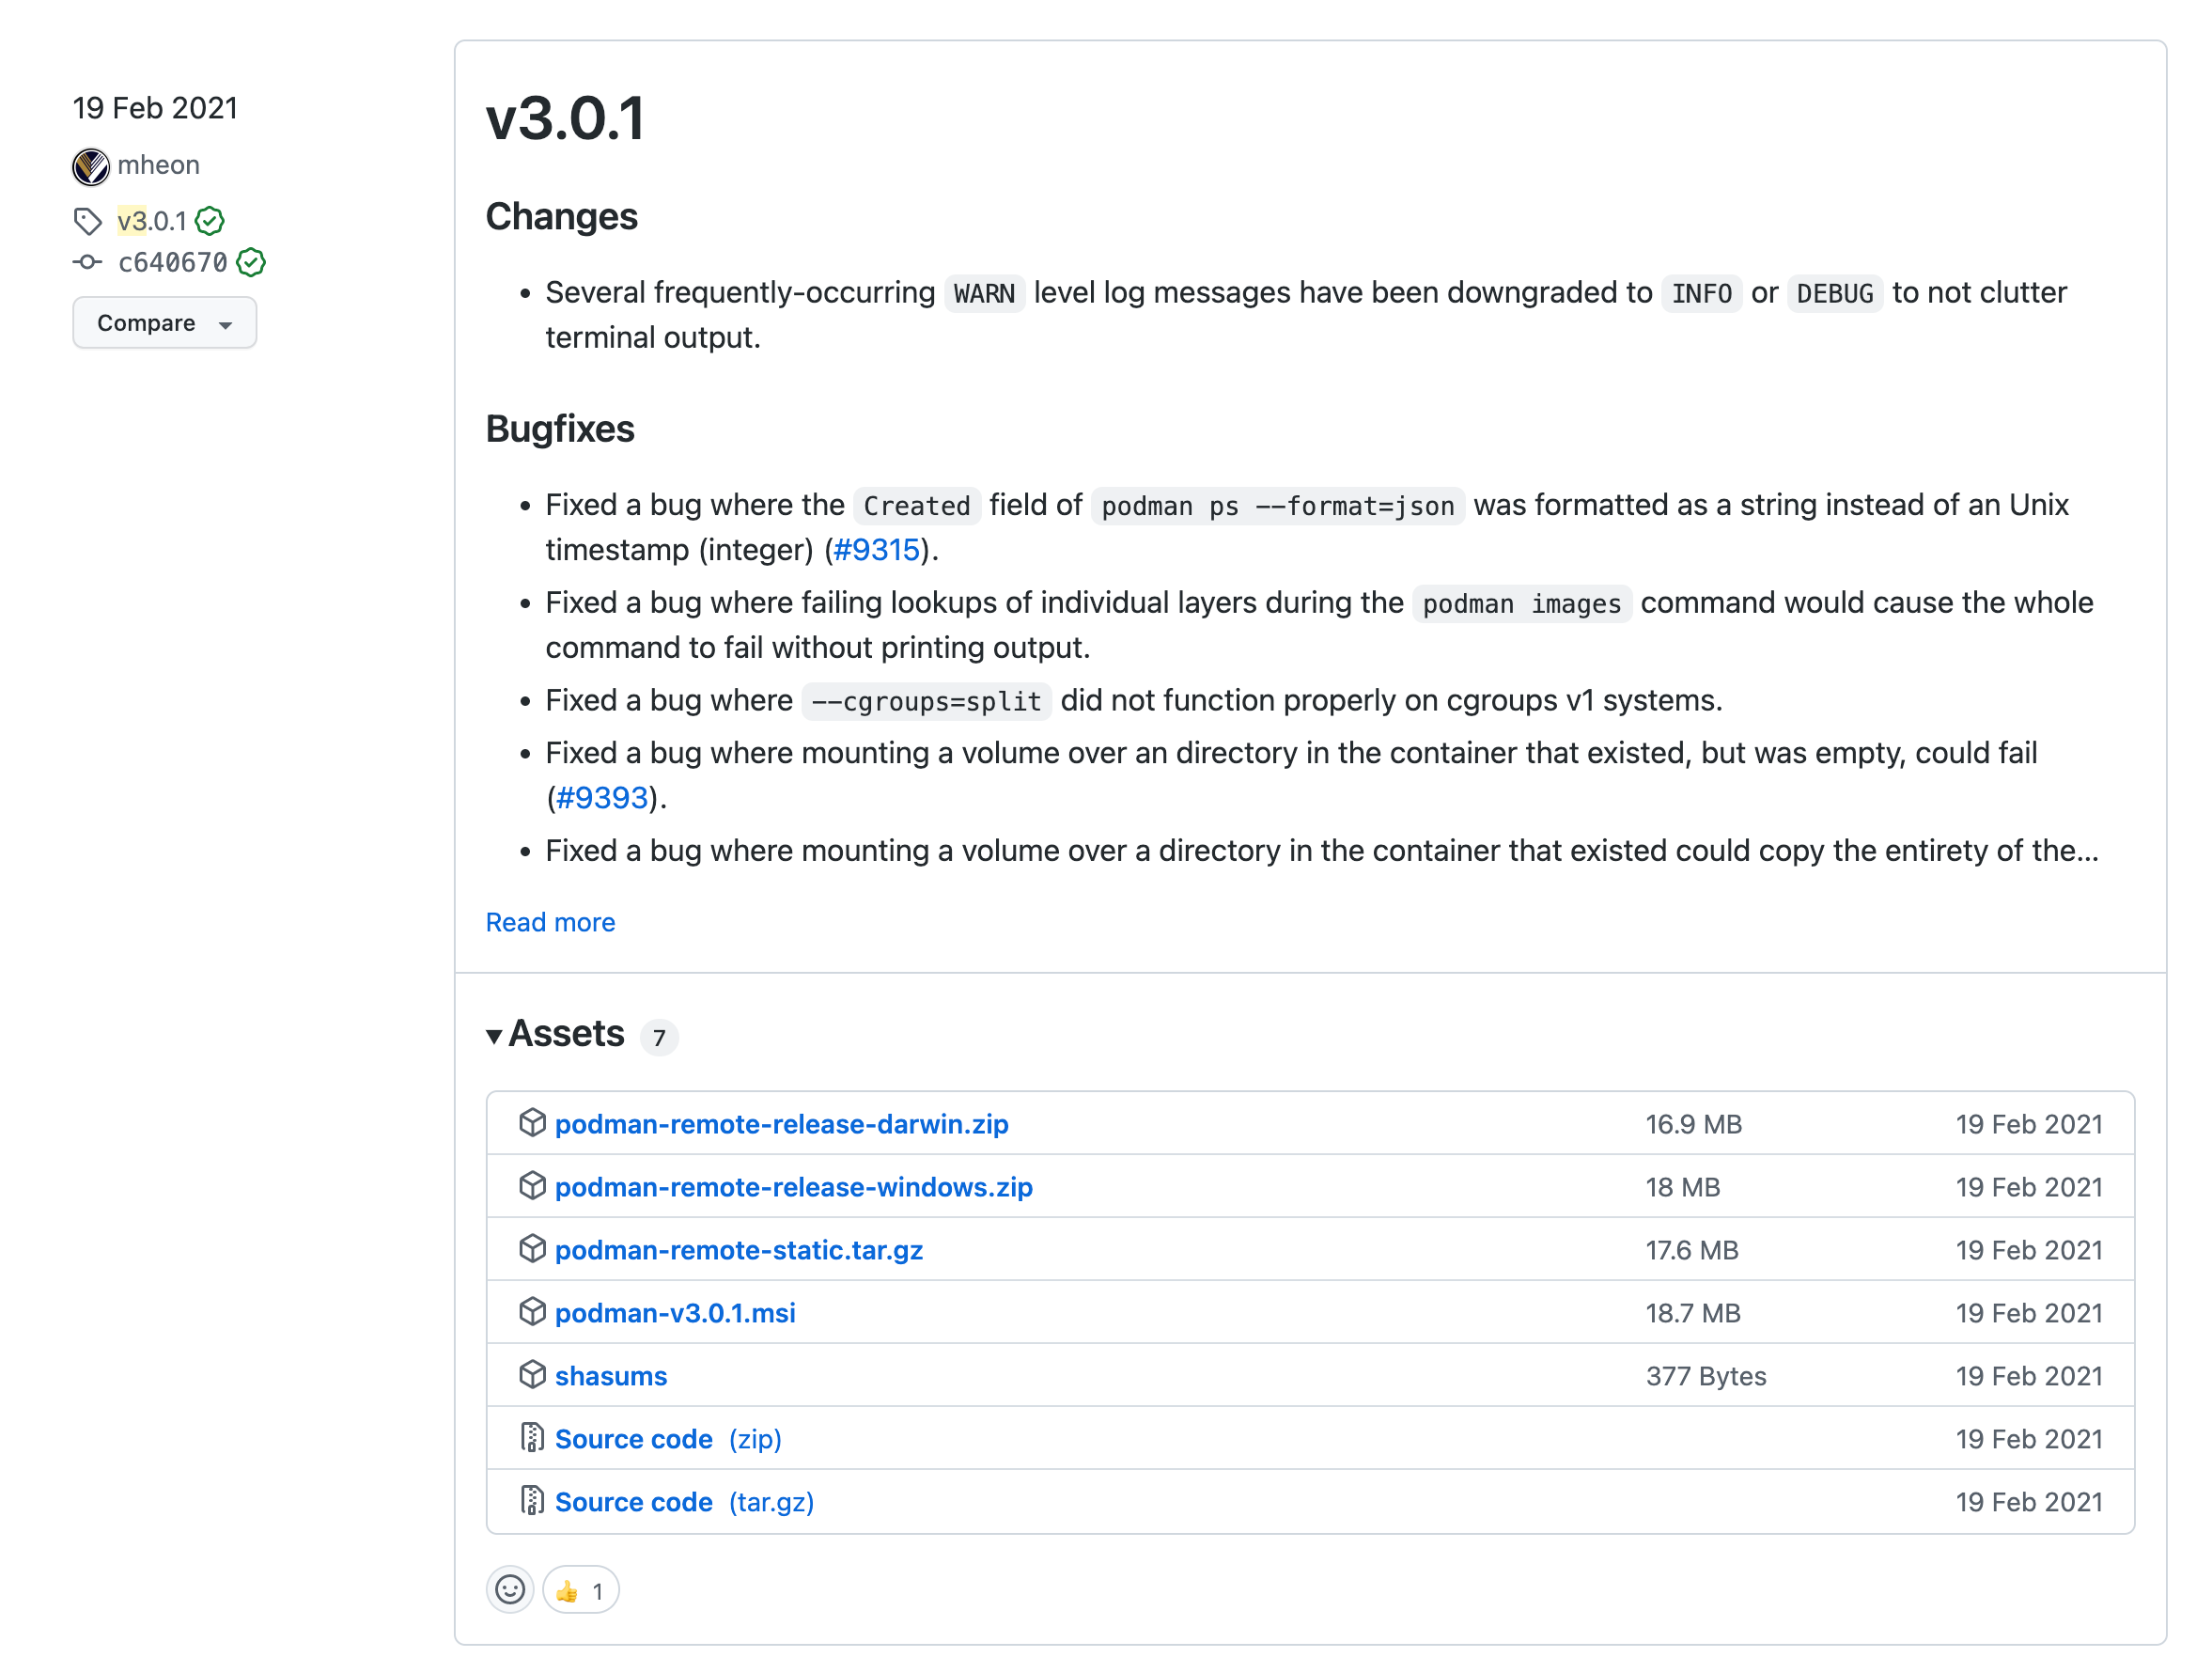
解压后,把podman二进制文件放到/usr/local/bin/下,或者放在顺手的地方,然后设置环境变量,都行
2、配置connect
首先,咱们把podman的私钥放到这里~/.ssh/podman-remote
然后给podman添加一个remote并设为默认连接
1 | podman system connection add --identity ~/.ssh/podman-remote podman-remote ssh://root@192.168.7.3/run/user/0/podman/podman.sock |
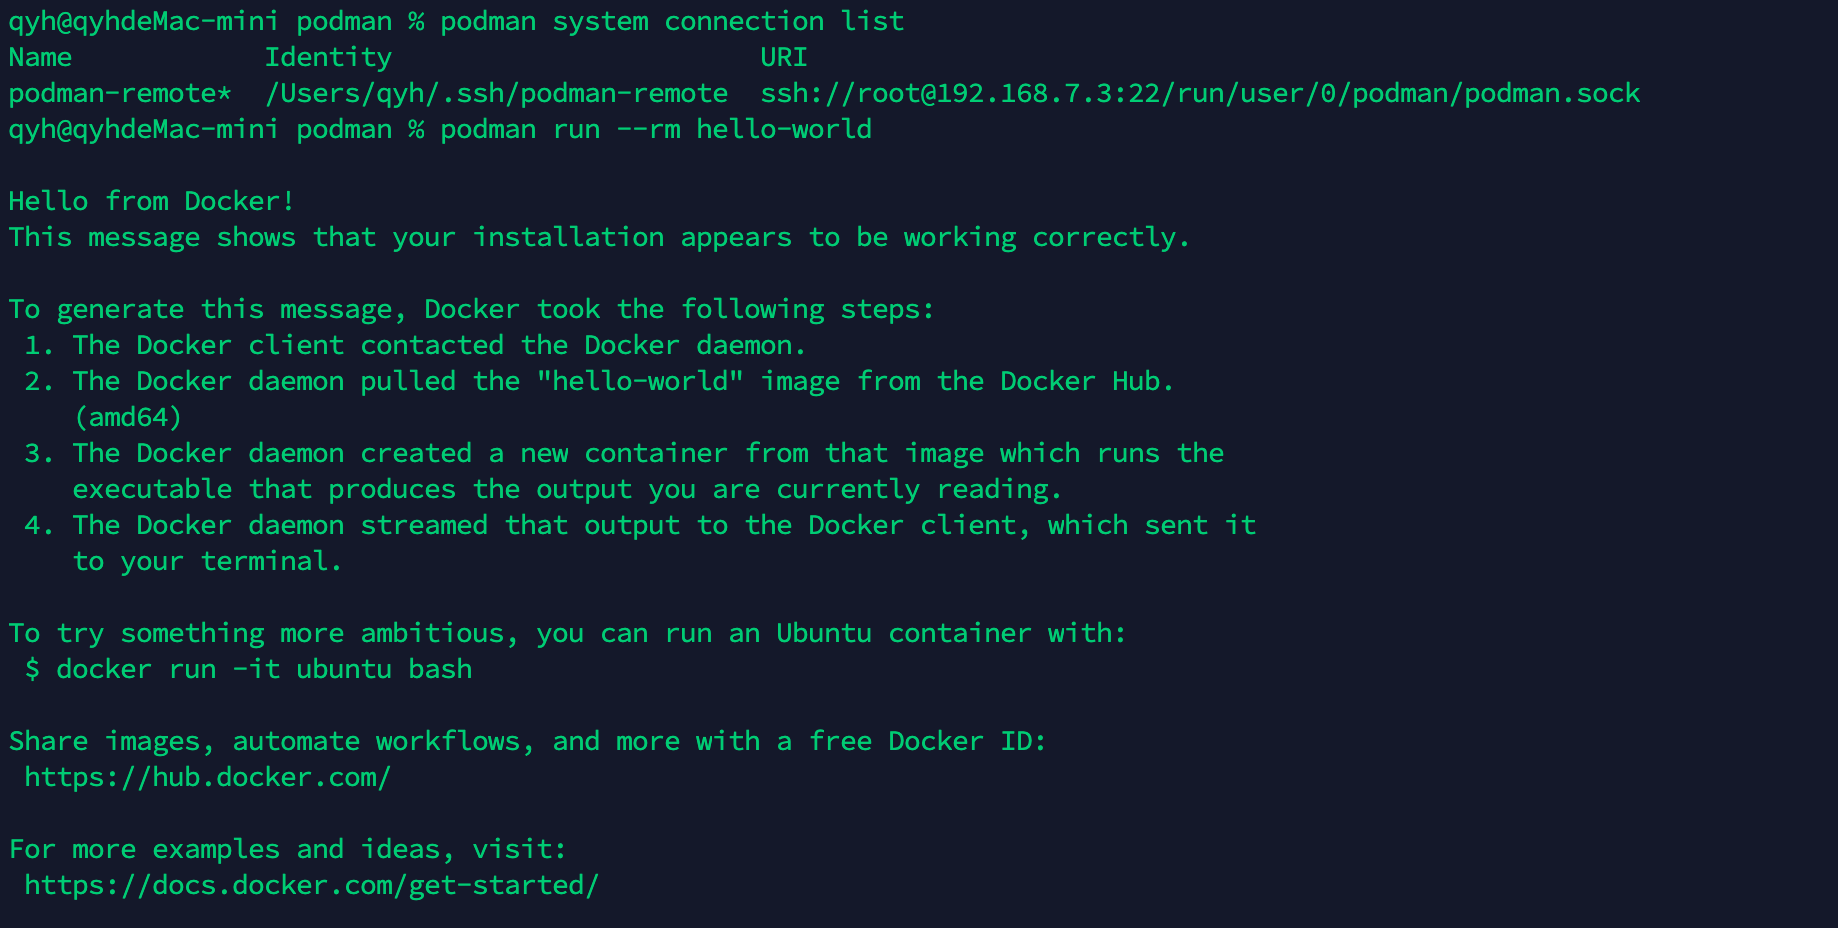
3、测试连接
用新建的connection访问远程podman
1 | podman run --rm hello-world |
小尾巴
利用rocky-linux获取新版podman
这时候就有聪明的小伙伴出来提问了:debian 11安装的podman是3.0.1版的呀,我想装4.0行不行?
安排,当然安排!
如果要在debian上安装新版本podman,由于官方没有提供对应的deb安装包,那就只剩编译安装这条路了。
但是静下心来想一想,咱们都用LXC方案了,编译安装有违咱们的初心其实还是因为懒,不如直接换一个包含新版的Linux环境
安装步骤如下
- 获取的CT源
- 创建CT容器
- 安装podman
- 配置podman-connect
其中大部分的操作和基于debian是同样的操作方法,这里只贴不同点
rocky-linux配置镜像源1
2
3
4
5
6
7sed -e 's|^mirrorlist=|#mirrorlist=|g' \
-e 's|^#baseurl=http://dl.rockylinux.org/$contentdir|baseurl=https://mirrors.ustc.edu.cn/rocky|g' \
-i.bak \
/etc/yum.repos.d/Rocky-AppStream.repo \
/etc/yum.repos.d/Rocky-BaseOS.repo \
/etc/yum.repos.d/Rocky-Extras.repo \
/etc/yum.repos.d/Rocky-PowerTools.reporocky-linux安装podman1
dnf install -y podman
参考资料
Proxmox 镜像使用帮助
Debian 镜像使用帮助
Rocky Linux 源使用帮助
podman 修改源和鏡像位置
Docker Proxy 镜像加速
使用 podman-remote 远程客户端远程访问 podman
若你觉得我的文章对你有帮助,欢迎点击上方按钮对我打赏
扫描二维码,分享此文章